如何修改Zen Cart后台管理路径(修改管理文件夹名称)

在旧版本的Zen Cart, 一般安装好了Zen Cart之后,管理后台的默认登陆路径都是 http://域名/admin。应该是1.5.x版本开始,安装好了 Zen Cart之后如果再输入以上默认路径登陆后台,系统就会提示“ Warning: You cannot access the admin until you have renamed the admin folder.”,要求我们更改管理文件夹名才可以登陆。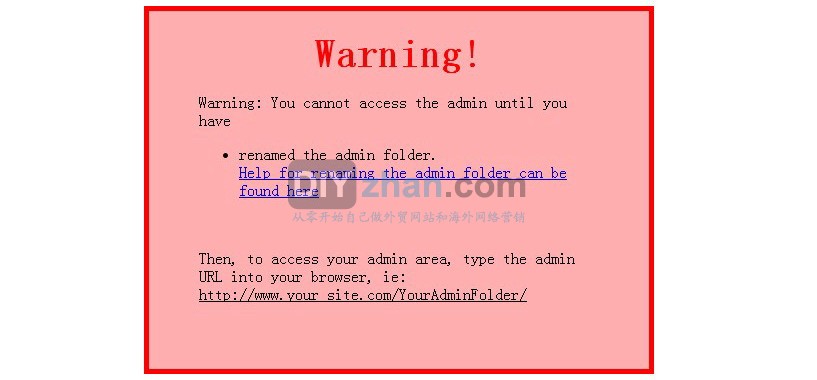
怎么修改管理文件夹名呢?请看以下官方英文教程链接:http://tutorials.zen-cart.com/index.php?article=33
(由于原文经常被墙,把原文COPY过来吧)以下是原英文教程原文:
While access to your admin area is protected by the requirement of your admin password, it is recommended for additional security that you rename youradmin directory after installation. This way, it will be significantly harder for hackers to find your admin area or attempt any attack on breaking into it.
(Before making the following changes, make sure to have a current backup of your files and your database.)
You’re going to do three steps: A) edit the configure.php settings and upload them, B) rename the admin folder, C) test login to the new folder.
Details are below:
Zen Cart v1.5.x:
A – configure.php – If you are using v1.5, go to step B. If you are using v1.3.x, see the next section below which explains how to edit this file properly.
There is no need to alter the admin configure.php in v1.5.x when renaming your admin folder. Simply proceed to step B.
(注:从1.5.X版本开始,我们不用再去修改configure.php了,而直接只需要修改admin文件夹名,而登陆路径只需要将原来 http://域名/admin 中的admin改为你所改的文件名即可);
B – Rename the Admin folder
Using your FTP software or your webhost’s File Manager, find your Zen Cart /admin/ directory. Rename the directory to match the settings you just made in step A.
NOTE: DO NOT advertise this new foldername, else you defeat the entire purpose of renaming it. And DO NOT EVER put it in your robots.txt file!
C – Login to your admin using the new URL
To login to your admin system you will now have to visit a new URL that matches the new name used in steps A and B above.
For example instead of visiting www.example.com/admin/ visit www.example.com/NeW-NamE4u/
Zen Cart v1.3.x:
A – (This step for Zen Cart v1.3.x ONLY: ) Edit /admin/includes/configure.php
IMPORTANT NOTE: If you’re using Zen Cart v1.5.0 or newer, you can skip this step, and proceed to step B to rename the folder using your FTP program. With v1.5.0 there’s no need to edit your configure.php file when renaming your admin folder.
1.3.x版本主要是更改网站根目录下的 /admin/includes/configure.php里面的3处”admin”为想要的管理文件夹名,并修改网站根目录下admin文件夹名为想要的管理文件夹名。
Using your FTP program, download a copy of your /admin/includes/configure.php file to your computer.
Using a simple text editor like notepad (or better yet, use Notepad++ or TextWrangler), change all instances of admin to your chosen new admin folder-name.
For maximum security, you may want to consider that new folder name should include numbers and a combination of upper and lower case letters. The longer you make this folder’s name the more secure it will be.
When editing, make sure you leave all the / (slashes) alone.
DO NOT USE SEARCH-AND-REPLACE TO DO THESE EDITS!!!!!!!!!!!(请不要使用Search功能来寻找替换)
Change ONLY THE WORD admin, in 3 places, AS SHOWN HERE:
Change this section:
 define('DIR_WS_ADMIN', '/admin/');
 define('DIR_WS_CATALOG', '/');
 define('DIR_WS_HTTPS_ADMIN', '/admin/');
 define('DIR_WS_HTTPS_CATALOG', '/');
And this section:
 define('DIR_FS_ADMIN', '/home/mystore.com/www/public/admin/');
 define('DIR_FS_CATALOG', '/home/mystore.com/www/public/');
You will end up with something that looks like this:
 define('DIR_WS_ADMIN', '/mysecretadminarea/');
 define('DIR_WS_CATALOG', '/');
 define('DIR_WS_HTTPS_ADMIN', '/mysecretadminarea/');
 define('DIR_WS_HTTPS_CATALOG', '/');
And:
 define('DIR_FS_ADMIN', '/home/mystore.com/www/public/mysecretadminarea/');
 define('DIR_FS_CATALOG', '/home/mystore.com/www/public/');
Now, you must upload the changes back to the server, using your FTP program.
IMPORTANT NOTE: Your configure.php file should be set as Read-Only for normal use. So, you’ll need to make it Writable before you’ll be able to upload/save your changes to the file. (In *some* cases, your server might require you to DELETE the file from your server before you can upload the edited version to replace it.)
Be sure to make it Read-Only again when finished. Often you can right-click the file in your FTP program and change the permissions settings there. There’s another FAQ article on how to change file permissions on different hosting servers.
B – Rename the Admin folder
Using your FTP software or your webhost’s File Manager, find your Zen Cart /admin/ directory. Rename the directory to match the settings you just made in step A.
NOTE: DO NOT advertise this new foldername, else you defeat the entire purpose of renaming it. And DO NOT EVER put it in your robots.txt file!
C – Login to your admin using the new URL (更改后的登陆路径是:http://你的域名/更改后的管理文件夹名)
To login to your admin system you will now have to visit a new URL that matches the new name used in steps A and B above.
For example instead of visiting www.example.com/admin/ visit http://www.example.com/NeW-NamE4u/
Use of SSL is highly recommended to protect your and your customers information. To enable SSL on your site, see this article: http://tutorials.zen-cart.com/index.php?article=14
D – What if it doesn’t work?
If it doesn’t work, then you’ve missed one or more of the steps. THE MOST COMMON MISTAKE is ignoring the read-only vs writable alert in BRIGHT RED TEXT in step A.
The second most common mistake is changing the WRONG THINGS! In step A, change ONLY the word “/admin/” in the 3 places shown.
原创文章,转载请注明: 转载自DIYzhan.com-从零开始自己做外贸网站和海外网络营销
本文链接地址:https://www.diyzhan.com/2014/04/zen-cart-admin-path/
相关推荐
- 外贸网站外部的优化:外链建设,社交网络优化
- Posted on 03月06日
- 欧美风格适合做专业外贸网站的WordPress外贸主题与模板(置顶)
- Posted on 08月13日
- 针对外贸企业开发的一款展示类WordPress外贸主题-DIYtheme
- Posted on 04月09日
- 服务器,虚拟主机以及一些相关的概念
- Posted on 01月23日
阅读提示(必读)
如果你使用WordPress做外贸网站,请参考《外贸网站建设》中的WordPress教程,熟悉WordPress后台,然后按照各个主题建站步骤建站,如:《使用WordPress免费搭建一个简单的外贸网站全过程图示教程》;使用WordPress做外贸B2C网站,你需要学习Woocommerce相关知识:《WooCommerce的简介与设置》 ,并学习WooCommerce相关主题与内容。
欢迎大家对本站教程指正和提出建议!
Siteground外贸网站WordPress专用主机

外贸自助建站与营销QQ群:341812967
 (加群请注明:diyzhan)
Q群1:26109379(已满)
如果你觉得本站很有意义,获益良多,请通过网站右边的“分享”按钮把本站分享到QQ空间,朋友圈,QQ群,微博等,让更多人得到帮助!感谢!
订阅我们

微信关注我们
微信添加博主,关注网站内容更新:


评论已关闭。